Friday, January 18, 2013
Thursday, January 10, 2013
How to using the WorldWind Java 0.2 SDK in Netbeans IDE 7.2.1
- Visit http://goworldwind.org/ and do some research about what WW really is and why you should use it.
- Follow the getting started tutorial to get familiar with the examples.
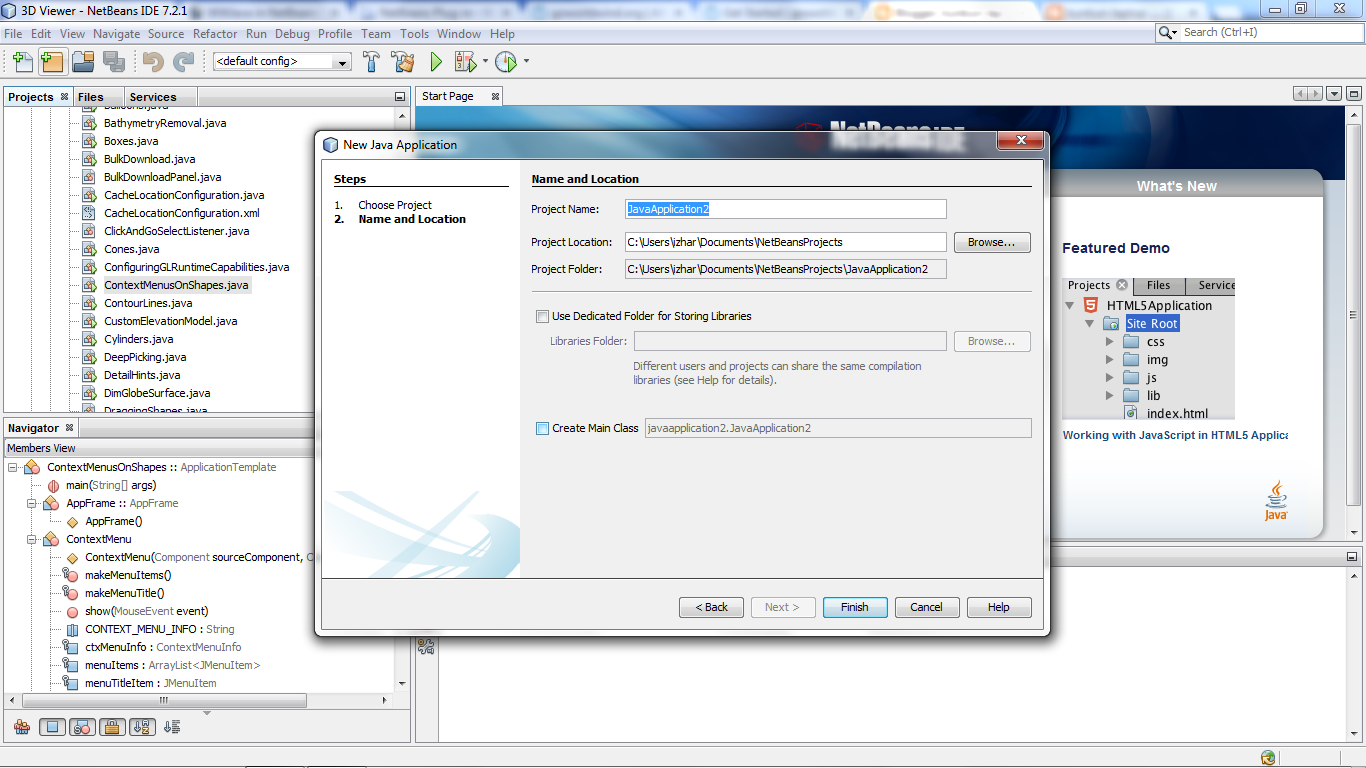
- Open NetBeans and create a New Project using the "Java Application" template. Fill in the required details but uncheck the 'Create Main class' box. Your new project should reside in a clean directory.
- In the src you downloaded from the release site and extracted, rename WorldWind's'build.xml' to something else (build_ww.xml) and copy all the WorldWind's unzipped content to your NetBeans project folder so that the src folders overlap. You should end up with a folder structure very similar to the WorldWind unzipped folder, plus a'nbproject' and a 'test' folders. The 'build.xml' file is the one created by NetBeans, not the one that came with the zip (which is why we renamed it earlier).
- From NetBeans, you will notice that some folders/classes are marked with a red exclamation mark. We now need to tell the project about the required libraries. Right-click your project's node and select 'Properties' (typically the last menu item). Select the 'Libraries' node from the Categories tree and press the 'Add JAR/folder' button on the right. Keeping CTRL down, select the 'gluegen-rt.jar','jogl.jar', 'gdal.jar' and 'plugin.jar' that are now inside your project folder. Click 'ok'.

- You can now run any of the examples by right-clicking them and selecting 'Run File' from the contextual menu.

Thanks. ;) http://forum.worldwindcentral.com/showthread.php?t=32347
Tuesday, January 8, 2013
How to using the WorldWind Java 0.2 SDK in Eclipse
Step 1: Download and unzip
Grab the code from sourceforge, it's a zip. Unzip it someplace. I unzipped it to c:\software\dev\worldwind.release You'll see that path later.
[edit]Step 2: Start Eclipse and create a New Java Project
Start Eclipse and to to File -> New -> Project. Choose a Java Project.

[edit]Step 3: Point to the existing source code
In the new project wizard, make sure to select "Create project from existing source" and point to the unzipped directory. Then press "Finish."

Done! That was easy. Not like the steps needed for the 0.1 code! Major kudos to the NASA Java team for including JOGL and having a nice directory structure that allows Eclipse to interpret where things are.
Checking the project's settings, we see the libraries have been included:

Here's a shot of Eclipse, running the two demo apps that come with it, worldwinddemo.AWT1Up in the foreground, worldwinddemo.BasicDemo in the background.
To run one of these apps, navigate to src/worldwinddemo/ on the right hand Package Explorer and right click on one of the java classes. In the context menu that appears, go to Run As... and choose Java Application.
There're some interesting things here, first there's a floating placemark (neat), second there's a GML line (also neat) in AWT1Up, and third zooming is all shaky and wierd (bad).

Here's the snippet that produces the icons along the equator, with a 2m meter ones at every 90.
private IconLayer buildIconLayer()
{
   IconLayer layer = new IconLayer();

   for (double lat = 0; lat < 10; lat += 10)
   {
       for (double lon = -180; lon < 180; lon += 10)
       {
           double alt = 0;
           if (lon % 90 == 0)
               alt = 2000000;
           WWIcon icon = new UserFacingIcon("images/32x32-icon-nasa.png",
               new Position(Angle.fromDegrees(lat), Angle.fromDegrees(lon), alt));
           icon.setHighlightScale(1.5);
           icon.setToolTipFont(this.makeToolTipFont());
           icon.setToolTipText(icon.getPath());
           icon.setToolTipTextColor(java.awt.Color.YELLOW);
           layer.addIcon(icon);
       }
   }

   return layer;
}
Thanks http://www.worldwindcentral.com/wiki/WWJava_in_Eclipse
Subscribe to:
Comments (Atom)